Dendroboard banner

Polygem-zoopoxy

1 reading
72K views 196 replies 32 participants last post by  S&H  
#1 ·
JoshH posted a link to this product and looking to see if there is any experience working with it.

I am looking to possibly try the EZ-sculpt modeling/sculpting putty,#307 FR Lite Flex, or the Vine Maker 60. I am really interested in upping my background making and interested in others experiences using this product.

Any info would be great.....
 
#6 ·
Do you honestly think I haven't done that? I'm not stupid....But the info isn't specific to what I am looking for thus I wanted to ask for specifics....Thanks though.

sent from my Galaxy S lll
 
#9 ·
Thanks Colin....I would appreciate more detail...

I am not sure which I want to work with yet but was leaning towards the sculpting putty and vine maker as I can create detail as I apply it. But was also looking at the 307 too....

When making branches do you apply to the whole surface at the same time or do it by sides? From what I have read the 307 is more fluid then the sculpting putty which I think would be hard to do all sides of a branch. As well I am sure you tinted it first but did you paint it afterwards? I have painted Drylok rocks but the acrylic paint over time seemed to wear off from misting.

When you make the rocks, I assume out of foam do you carve the intricate details first or leave that for after the application? It looked like it was quite plyable for awhile to do fine work.

Do you have any threads? I searched here and other sites not much specific info alot of the threads showed what they made but notbthe process during creation or how they applied....I just want to get an idea before I drop $400 on this stuff....So once I get it I am hitting the ground running not wasting or making big mistakes and have to tear out the viv...

Do you make everything outside of the viv and then glue it in? The rock walls or rocks I have done in the past was GS foam applied in viv then carved and coated with Drylok all in viv.

They turned out great but not sure if this product is applicable for that type of application... most of the builds on other sites were done outside the tanks(fish) then glued down.

sent from my Galaxy S lll
 
#8 ·
I have used this product many times, easy to work with, no nasty smell, 1000% safe non toxic, decent pot life, can be tinted/colored with pigment, a little goes a long way, dries rock hard, can be sanded, can be painted and I am sure I have missed something else this is a great product but I think the price scares people off but if you were to buy the 2 gallon kit " 1 gal A 1 gal B you could make a great deal of backgrounds, rocks or whatever. Buy it use it you will not be disappointed with it. I am going to get another kit soon to do a 36 x 36 x 72 and when I do I'll try to get some pictures. I think they still make smaller kits, this stuff is awesome but not cheap.
 
#11 ·
Thanks DandD....

I am looking to do a couple 18x18x24s rockwalls/rock piles and maybe a fake tree or branches....If I go with anything it will be the 2g kits...The 2qt prices are nice but would hate to get in the middle of a build and not have enough..

Have you used the sculpting putty?

sent from my Galaxy S lll
 
#12 ·
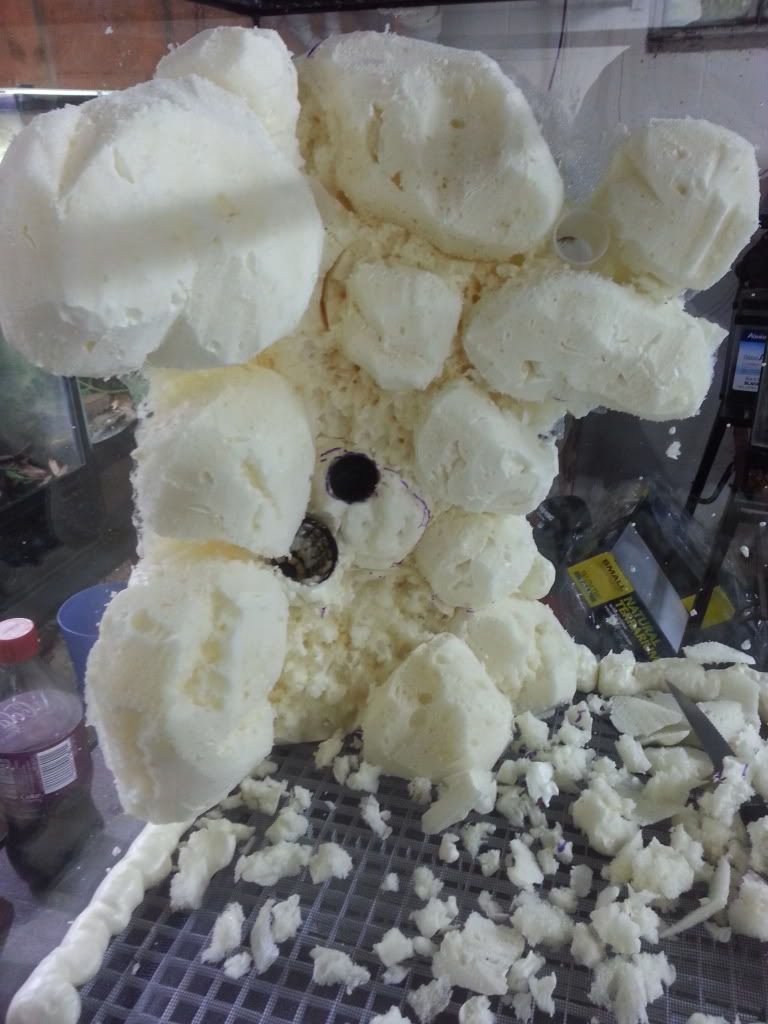
I have used the putty, you really only need about 1/8" thick over great stuff, wads of newspaper with plaster cloth for surface and shape let it dry and sculpt away. I used to have many pictures in my album years ago but were all deleted at some point when the site was purged. You will love this product!
 
#14 ·
Awesome... Thank you.....

I am used to sculpting with clay and getting detail that you can make out of it or in it. The putty seemed to be simular and what I was leaning towards....

If I was to carve a rockwall( applied in viv GS foam) and wanted to apply the putty over the top will it adhear to the glass or should I still use something like Gorilla glue along the edge of where it meets the glass?

Thanks for all the replys guys and gal....I appreciate it.
 
#16 ·
Is the sculpting putty that soft or you talking the 307?

In the picture on the site it shows a hand with like a ball of the product. Or could that be with applying the thicking agent?

Thanks for all of your replies DandD.

sent from my Galaxy S lll
 
#17 ·
I have only used the regular 307 formula, but I will echo what others have said; fantastic. It requires a little more tooling than I had expected, but this gives more opportunity for fine-tuning your textures. I've used zinc oxide pigments for tinting, and Krylon fusion paints for coloring after application, both work well.
I plan on experimenting with some natural additives (sand of varying particle sizes, coconut mulch & charcoal) next time I use it to hopefully emulate a little more natural surface with less work.
 
#19 ·
It is that soft, like peanut butter, you can add other stuff to the surface such as sand, soil, tree fern as long as it is still wet. Polygem also sells pigments for coloring as well or at least used to
Thanks guys ..gonna order a 2g kit this week....Can't wait to try something new...Kick my background building up a notch.

James

sent from my Galaxy S lll
 
#20 ·
I never assume anyone is stupid...my apologies...but we know that there ARE people who post that don't do any searching...since I was short of time, just pointed out that posts were listed and if you tried them, the posters here on DB might be the members who have made vivs using those products--as I had seen them some time ago. Obviously by the number of posts you've made, you may have seen the same vivs...apologies again...
 
#26 ·
Building rocks with this product is very similar to other methods. I like to use pink or blue sheets of insulation foam siliconed together. I prefer this foam over great stuff because of how dense and solid it is, allowing for a much greater level of carving detail, which will be reflected in the final product, also you can apply the epoxy in thinner layers and still achieve total coverage. I then add zinc oxide pigments and a couple handfuls of play sand (for rocky texture) to the mixed epoxy and apply it to the foam structure in about a 1/8" thick layer and let it sit for about half an hour. At this point the epoxy has become stiffer and more putty like and I can go back in and add more details with various tools or stamps. After about 24 hours or whenever the piece has fully cured I paint it with several coats of watered down acrylic paint. Here are some pictures of a build I did a couple years ago featuring epoxy rocks attached to a tree fern background. This is one of my favorite background combinations.
Image

years (and several re-plants) later:
Image


Here is a background that is totally epoxy. I made the rocks individually, put them in position in the back of the tank and filled in around them with great stuff. I them carved down the great stuff and covered it with a layer of epoxy I had tinted a tan color, as it cured I added sand and gravel to give it the appearance of an eroded rocky bank.
Image

Grown in:
Image

As you can see plants and moss do grow on this stuff depending on what textures you have created with it, but growth will never be as fast/lush as with organic backgrounds. I have also created tree buttresses with #307 that have turned out ok but that I have never been fully satisfied with, I feel the E-Z sculpt would be a much better product for trees/roots/branches etc. I am about to begin building a large plywood tank that will a fully epoxy background, rock work with great stuff in between that will be covered in #307 tinted dark brown/black with tree fern fiber on top. I also plan on creating some large liana vines out of pvc pipes and either #307 or E-Z sculpt, I have yet to decide.
 
#29 ·
No doubt...I will do that for sure...I have 5 builds in my near future that need to be done....Will contact you once I get my hand on this stuff and working it.

sent from my Galaxy S lll
 
#30 ·
Got my zoopoxy ordered.... Good thing is they are out of Chicago so hopefully it can get here by friday or so....If it does I can start a build thread or just use this one.....Which might be a good idea since if someone searches polygem or zoopoxy it will come up....

Excited to get started.... Will post a picture of what I have gotten done so far...
 
#32 ·
So the zoopoxy will be here tomorrow....Lucky for me they are less then 3 hrs away....So by tomorrow evening I will have hopefully laid down my first coat....

Here is the wall finished with a rough detail.

Image


Image

sent from my Galaxy S lll
 
#33 ·
Got the zoopoxy today and started applying. Much thicker then I had imagined....Pretty cool stuff...

Will have to say a standard plactic spreader was a little awkward to get between the rocks with out kinda pulling putty from the rock on the otherside....But all in all I can't see me using anything else....This stuff is cool....
Image


I think it looks decent but getting an understanding of how the putty is able to be worked and spread will be key....understand though it needs to be sanded and painted....Have a three day weekend so plenty enough time to really get at it.

If there is any other advice or comments please post...

sent from my Galaxy S lll
 
#34 ·
If you wear latex gloves, wet your fingers with water and you can smooth it out, while it's wet of course. I had very little sanding doing that plus you can push the putty where you want it to go. And how about being able to work in your frog room with no nasty smell:)
 
#35 ·
Thanks....You know I thought about that after I started looked for my gloves which the package was empty...gonna go get some tomorrow....Great idea will come out much better....

Yeah the lack of fumes and smell is a huge plus...one reason I got away from silicone....Thanks bro for the heads up on that....

James

sent from my Galaxy S lll
 
#37 ·
Awesome that will for sure help tomorrow....Will have to sand a bit that I have now but tomorrow will do it that way instead and willing to bet a weeks pay check it will turn out more finished from the start....

Thanks guys for sharing...

sent from my Galaxy S lll
 
#38 · (Edited)
you can also use the dry color pigment used for concrete, just use a damp paint brush lightly drag the brush with pigment across your work to create streaks in rocks or vertically to create tree bark look. What was the cost for the kit you purchased? did you get the 2 gallon kit? like I said you really don't have to put it on heavy a little goes a long way, you will have a lot of fun with this stuff
 
#39 ·
Thanks...Yeah I can see this going far....It was $138 shipped for the 2 gallon kit....I almost got the 2qt but opted for the big kit...well worth it in the end...I have 5-6 builds that need to be built....so the 2 gallon was the best option long term.

I appreciate all the advice and tips. Hopefully this thread will help some one else that might or want to use zoopoxy...I will be taking more pictures tomorrow as I work it.

sent from my Galaxy S lll
 
#40 ·
I think I built nearly 20 backgrounds using that kit, when you do the math it's cheaper than silicone. I really don't know why more people don't use it, I guess the price seems high until you do the math. I have only seen it even mentioned a dozen or so times in the last 10 years.
 
#41 ·
Yeah I hadn't heard of it till it was mentioned the other day in the other epoxy thread....Once I looked it up and what you are capable of doing with it and talking to you guys, it was a no brainer.

sent from my Galaxy S lll
 
#42 ·
I think a large part of it is that a lot of people aren't comfortable with their carving/sculpting abilities. I know mine are pretty bad. I couldn't get to even the point you are at. (Which looks great!) So I think that's a part of it, but it's also that people are wary of using anything "new". Everyone wants to err on the side of caution when it comes to chemicals around their frogs and I can see people sticking with silicone due to its ease of access (Lowes/HD) and history/ubiquitous use. BUT, you can get infinitely better results with epoxy when used properly and take the time. (Or coax an artistic girlfriend to sculpt it for you, as I use to. LoL)

Zoopoxy has some cool stuff, just make sure you use their products that don't contain nonylphenol. Check the B side of the MSDS. They have some that do. It's a nasty chemical used as an epoxy filler and catalyst. It's quite toxic to marine life and as a true catalyst it remains unbound (chemically) in the epoxy matrix and can leach out into your build. Nonylphenol has been banned the UK for years, but the US still uses it by the tons and as a result very few US based epoxy products don't contain it. And is one of the reasons why I decided to formulate my own without it.
 
#46 ·
So I think that's a part of it, but it's also that people are wary of using anything "new". Everyone wants to err on the side of caution when it comes to chemicals around their frogs and I can see people sticking with silicone due to its ease of access (Lowes/HD) and history/ubiquitous use. BUT, you can get infinitely better results with epoxy when used properly and take the time. (Or coax an artistic girlfriend to sculpt it for you, as I use to. LoL)
The Zoopoxy line of products have been around for many years but they only made online ordering available recently. I feel this is because most of their business is with zoological institutions that would be ordering very large quantities.