Dendroboard banner

Building and Using a Co2 Generator

62K views 25 replies 8 participants last post by  varanoid 
#1 · (Edited by Moderator)
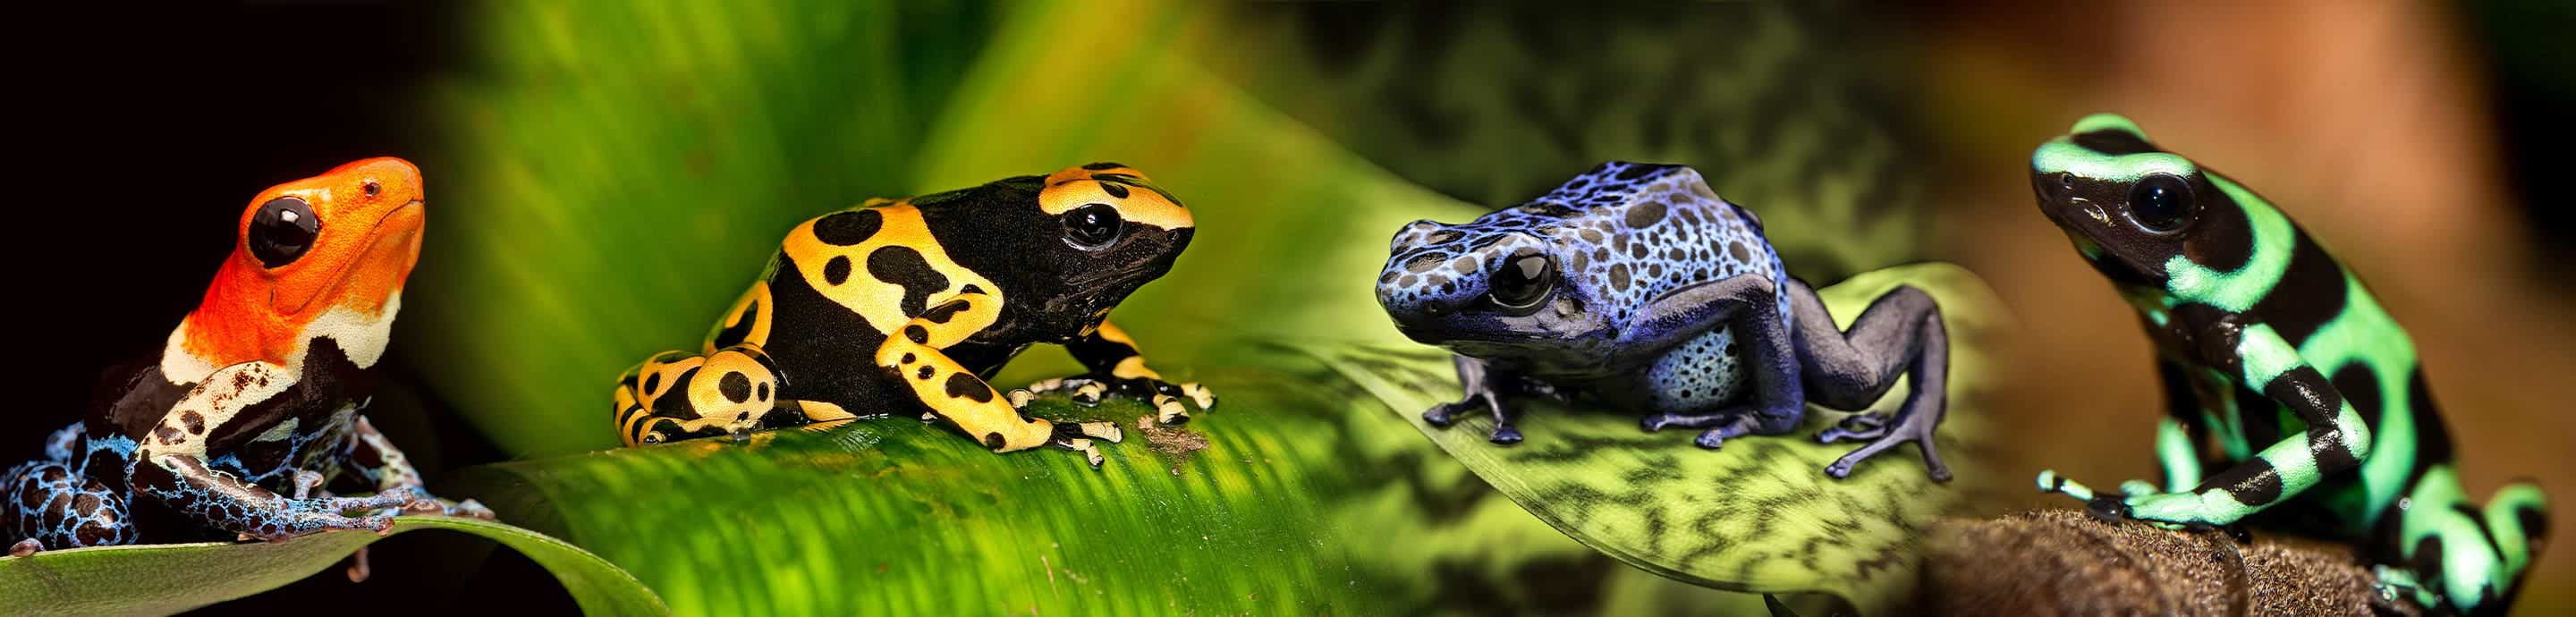
The Use Of CO2 In The Frog Hobby
There are several avenues or areas that we could use CO2 in our hobby.
  1. Killing bugs and slugs in new plants before they are introduced to a tank.

  2. Killing bugs and slugs in existing tanks. You might need to gas a tank several times in order to get rid of them because their eggs are very resistant to the oxygen deprivation or hypoxia.

  3. During the process of photosynthesis plants use atmospheric carbon dioxide to make the sugars that they need to build cellular tissue. Higher levels of CO2 seem to stimulate higher rates of photosynthesis and therefore higher growth rates. Therefore if you have a plant that is not doing well, giving it a boost in CO2 during the day-time hours may help to bring the plant back.

  4. According to the American Veterinary Medical Association CO2 is considered to be an appropriate and humane way to euthanize a sick or dying frog. (Edit by mod in 2020: this has changed. Read thread replies below.)

  5. While not frog related, you can carbonate your own beverages and you can be the life of the party with some of the dry ice tricks that I will share later.


I think that having the ability to easily and consistently generate CO2 would be of great benefit to us in the hobby so I began to so some research and then developed this article. Let’s looks at some of the options available on how to produce CO2.

This article will cover these different methods of producing CO2
  • Dry Ice
  • CO2 Chemical Generation
    • How to Build and Operate a CO2 Generator
    • Ways to Test for CO2 levels
  • Using compressed CO2 Tanks
    • Paintball Tanks (reusable)
    • Bike Cylinders (non-reusable)
  • Euthanasia Tank
  • Simple Moss and Plant CO2 Chambers


Methods of Producing
Carbon Dioxide or CO2 Gas


1. Dry Ice CO2 Production

Most of us are familiar with using dry ice to generate CO2 gas. Dry Ice is frozen carbon dioxide. When it is warmed up, it goes directly from being a solid icy form to being a gas with no liquid stage in between, hence the name dry ice. So in order to generate the gaseous form of carbon dioxide, all we have to do is warm up a little dry ice. But dry ice has some drawbacks.

  1. Dry Ice is cold, extremely cold. In its frozen or solid state its temperature comes in at a nippy -78.5 degrees C or -109.3 degrees F. This extreme temperature can quickly damage plants, people and critters. If you bump or poke dry ice, it just feels super cold but you aren’t likely to suffer frostbite or skin damage. If you try and hold it or if it comes into contact with your skin for more than the briefest instant, the skin cells will freeze and you will feel a really nasty burning sensation. So if you work with dry ice always wear gloves, a long shirt, and safety glasses. I cringe when I see some of the idiots on youtube holding or chewing or chipping and breaking up dry ice without safety glasses. Holding it in your teeth can freeze the enamel of your teeth making your teeth brittle. If you need to break up dry ice, cover it with a towel as you break it up. Personally I think some of these guys on youtube are industrial strength stupid.

  2. If you seal dry ice in an airtight non-vented container with the lid on too tightly, the container becomes a high-pressure bomb.


  3. If dry ice comes in direct contact with the glass of your tank, the glass is likely to shatter due to the extreme and quick temperature changes. Metal does sing quite nicely though when it is placed in contact with dry ice.

  4. Although dry ice / carbon dioxide is not toxic in and of itself, the use of dry ice may create respiratory hazards for you and your animals. This is because carbon dioxide is heavier than the surrounding air that we breathe. Thus CO2 will fall down and displace all of the oxygen in any container thus creating a deadly hypoxic environment (lacking oxygen). Thus one should use CO2 only in well-ventilated areas.

  5. While this hypoxic environment is fine for killing bugs and slugs, dry ice is not considered a proper or humane way of euthanizing an animal. There are several reasons for this.
    • a. The ultra-cold CO2 gas can cause the animal stress due to cold shock and frostbite.
    • b. Animals can potentially be exposed to cold flesh burns and frostbite if they are incorrectly placed in the same tank as the dry ice and come into direct contact with the dry ice.
    • c. Co2 flow rates going into the euthanasia chamber should be regulated fairly precisely, which is something that is not easily done with CO2 produced by dry ice.


Marty posted one of the best articles that I have seen with excellent photos of the process of how to safely use dry ice to rid a tank of pests.
Eliminating Vivarium Pests - Geckos Unlimited

I believe the key to using the dry ice method successfully and safely is to use hot water to initiate and activate the CO2 release. If you use enough hot water, it will raise the temperature of the CO2 gas enough so that you don’t toast your plants while you attempt to fry the bugs.


Dry Ice For Fun

I added these videos of a couple of interesting and cool things that you can do with dry ice. While it is not frog related, it is just plain fun all the same and we all need a little of that now and then.


2. Making a chemical CO2 Generator

Now if you wanted to go the least expensive route for generating CO2, you should build a CO2 generator.


A. Yeast / Sugar Generator:
The aquarium hobby uses a generator that uses yeast and sugar to create the CO2 but this type of generator is not likely to work well for us, except in a few instances where you want a long term slow generation of CO2 for plant growth / health or to generate an extended period of CO2 exposure for those really pesky pests that can handle some oxygen deprivation for a period of time.

Do-It-Yourself Carbon Dioxide Injection

This generator works by using yeast that digests the sugars in a breeding medium. One of the by products is CO2.

The Problems With Yeast / Sugar CO2 Production Systems
There are several problems with a system like this. This setup is designed to produce a steady but low volume of CO2 and when the system is first set up not a lot of CO2 is produced. It takes time for the yeast to ramp up production, to digest the sugars and to reproduce which means that the CO2 production ramps up slowly.

The other problem is that the yeast might not produce enough CO2 to displace all of the oxygen that we are trying to oust from the tank. Also as long as the lights are on, any plants that are in the tank will be metabolizing as much of the CO2 as they can.

Typically what we need in our hobby is a method for creating a lot of CO2 in a short period of time. I list it here because there are a few instances that this might be of benefit to us. (More on this later)


B. Vinegar & Baking Soda Generator:
This seems to be a much better method of creating CO2 for our hobby.

If you have ever mixed vinegar and baking soda together and seen all the bubbles produced or if you have mixed baking soda and water and poured it over your car’s battery in order to clean the battery terminals you have seen all kinds of CO2 gas bubbles being generated by this mixture of chemicals.


Here is a video of the CO2 Generator that I built and of the procedures that I use to generate the CO2. This tank has had a good slug infestation that the various nightly lettuce raids were not making a dent in their population. They came in on one plant that I had recently purchased. If I had treated this one plant by itself with CO2 it would have saved me a lot of time and trouble.


Video of the Generator in Operation


The Baking Soda / Vinegar Reaction:
When you mix an acid, in our case vinegar, which is a 5% acetic acid, with Baking Soda, also known as Sodium Bicarbonate (NaHCO3). A chemical reaction takes place as they are mixed that generates carbon dioxide gas (CO2) and water as bi-products. The reaction between baking soda and vinegar is actually two reactions, an acid base reaction followed by a decomposition reaction. They just take place extremely quickly in rapid succession.

The Ratios: Vinegar / Baking Soda
While researching the proper ratios of Venegar & Baking Soda, I found conflicting data on what the proper amounts of Baking Soda and Vinegar were to mix to together to get a balanced reaction.

Therefore, I checked with the folks on one of the science forums I belong to, Science Forum - Scientific Discussion and Debate

I asked the Chemistry folks if they would calculate the proper amounts of Baking Soda and Vinegar needed to generate a gallon of CO2 gas.


The reaction is as follows:

NaHCO3 (aq) + CH3COOH (aq) ......> CO2 (g) + H2O (l) + CH3COONa (aq)

Thus: 84gmw 60gmw 22.4L gas (i mole)

THE APROX CALCULATIONS ARE:
  • Because Vinegar is only 5% acetic acid - 200ml of vinegar has about 10 grams of acid or 16.6% of a mole of acetic acid.
  • We need 16.6% of a mole of baking soda which is 13.9 grams.
  • Thus you would get 16.6 % of a mole of gas or 3.7 Liters of CO2 gas which equals about .97 gallons of gas

For all you purists I know these calculations are approximated but they are close enough.

Therefore you need 14 Grams of Baking Soda mixed with 200 ml of Vinegar which then produces 1 Gallon of Co2


From this I generated the following Table along with the Kitchen equivalent measurements:

CO2 Ingredients Table:

………………… Baking Soda ……………………|………………………………………… Vinegar ……………………………………………|… CO2 Output
……14 gr =…………………3 t.……………………|…200 ml = ……7/8 c. = ………6.76 fl oz……………………|…… 1 Gallon
……28 gr =……………… 6 t. = 2 T. |…400 ml = 1 2/3 c. = ……14.53 fl oz……………………|…… 2 Gallons
……70 gr =……………1/4 c. + 3 T. | 1 L =……… 4 1/4 c. = ……33.81 fl oz …………………|…… 5 Gallons
…140 gr =………1/2 c. + 3.4 t. | 2 L =……… 8 1/2 c. = … 67.62 fl oz …………………|… 10 Gallons
…280 gr = 1 1/8 c. + 4.8 t. | 4 L = 1 gal. + …… 7/8 c. = 135.25 fl oz …|… 20 Gallons
…420 gr =…1 3/4 c. + 4.2 t. | 6 L = 1 gal. + …8 1/3 c. = 202.88 fl oz …|… 30 Gallons
…560 gr = 2 3/8 c. + 3.6 t. | 8 L = 2 gal. + …1 7/8 c. = 270.51 fl oz …|… 40 Gallons
…700 gr =………… 3 c. + 3.0 t. |10 L = 2 gal. + 10 1/3 c. = 338.14 fl oz …|… 50 Gallons
1400 gr = 6 1/8 c. ………………………|20 L = 5 gal. + …4 1/2 c. = 676.28 fl oz …|…100 Gallons

Key to Abbreviations:
Teaspoon …… Tablespoon … Fluid Ounces … Cup … Pint … Quart … Gallon …… Gram … Liter

t. = tsp. … T. = tbsp. ……… fl oz ………………… c. …… pt. …… qt. ……… gal. …… g. = gr … L …


Liquid (Fluid or Volume)
(Measurements are Approximates)

Volume …|…… Fluid Ounce …|……………… US Equivalent ………………|… Metric Equivalent
1 t. ……………|…………………………………………|……………… 1/3 T. …………………………………|………… 5 ml
1 T. ……………|……… 1/2 fl oz………|…………………… 3 t. …………………………………|……… 15 ml = 15 cc
2 T. ……………|…………… 1 fl oz ……|……… 1/8 c. = 6 t. ………………………|……… 30 ml = 30 cc
1/8 c. ………|…………… 1 fl oz ……|…………… 2 T. = 6 t. ………………………|……… 30 ml = 30 cc
1/4 c. ………|…………… 2 fl oz ……|…………………… 4 T. …………………………………|……… 59 ml
1/3 c. ………|… 2 2/3 fl oz ……|…………………… 5 T. + 1 t. ………………|……… 79 ml
1/2 c. ………|…………… 4 fl oz ……|…………………… 8 T. …………………………………|…… 118 ml
2/3 c. ………|… 5 1/3 fl oz ……|………………… 10 T. + 2 t. ………………|…… 158 ml
3/4 c. ………|…………… 6 fl oz ……|………………… 12 T. …………………………………|…… 177 ml
7/8 c. ………|…………… 7 fl oz ……|………………… 14 T. …………………………………|…… 207 ml
… 1 c. ………|…………… 8 fl oz ……|……… 16 T. = 1/2 pt. …………………|…… 237 ml
… 2 c. ………|………… 16 fl oz ……|……… 32 T. = … 1 pt. …………………|…… 473 ml
… 4 c. ………|………… 32 fl oz ……|……… 2 pt. = 1 qt. ………………………|………946 ml
1 pint ………|………… 16 fl oz ……|……… 32 T. = 2 c. …………………………|…… 473 ml
2 pints ……|………… 32 fl oz ……|………… 4 c. = 1 qt. ………………………|…… 946 ml = 0.946 L
8 pints ……|……… 128 fl oz ……|……… 4 qt. = 1 gal. ……………………|… 3785 ml = 3.780 L
4 quarts …|……… 128 fl oz ……|……… 8 pt. = 1 gal. ……………………|… 3785 ml = 3.780 L
1 liter ……|……… 1.057 qt. ……| 2.11 pt. = .026 gal. ……………|… 1000 ml
1 gallon …|…………128 fl oz ……|……… 16 c. = 8 pt. = 4 qt. …|… 3785 ml = 3.780 L


Dry (Weight) Measurements
(Measurements are Approximates)

1 ounce ……………………………………………………………………………………………………………… 30 grams (28.35 grams actual)
2 ounces …………………………………………………………………………………………………………… 55 grams
3 ounces …………………………………………………………………………………………………………… 85 grams
4 ounces ……………………………… 1/4 pound …………………………………………… 125 grams
8 ounces ……………………………… 1/2 pound …………………………………………… 240 grams
12 ounces ……………………………… 1/4 pound ………………………………………… 375 grams
16 ounces ……………………………… 1.0 pound ………………………………………… 454 grams
32 ounces ……………………………… 2.0 pounds ……………………………………… 907 grams
1 kilogram …………………………… 2.2 pounds = 35.2 oz. ……… 1000 grams


A note about kitchen measurements:
Not all tablespoons are the same. The Australian tablespoon is 20 ml; the British tablespoon is 17.7 ml. In most Canadian recipes, the tablespoon is 15 ml., while the American tablespoon is 14.2 ml.
In British, Australian and sometimes Canadian recipes, the "imperial pint" is used which is 20 fluid ounces. American and sometimes Canadian recipes use the American pint of 16 fluid ounces.
 
See less See more
#2 ·
Purchasing the Chemicals
Because both white vinegar


and baking soda


are so inexpensive, this really is an excellent method to produce a lot of CO2. You don’t need to worry if your ratios are not exactly right. The reaction will run until you use up one of the chemicals and then the reaction will stop. Add more of the missing ingredient and the reaction will continue generating CO2 right where it left off.

Also you can purchase the cheapest Baking Soda and Vinegar available.


We are not making a fancy meal, so you don’t need to buy the more expensive stuff. The reaction is the same whether you purchase the cheap vinegar or the expensive stuff. Either one will produce the same amount of CO2 output. While checking out the prices at the grocery store today, I noticed that one of the vinegars had an acidic content of 4 %, while all the rest where 5 % acidic. We need the 5 % to get the most CO2 production.


Price Ranges

One Gallon of Vinegar: $1.22 to $4.78. (Creates a little less than 20 gallons of CO2)

One Pound / 16 oz. / 454 gr Box of Baking Soda: 44¢ Cents to 98¢. (Creates about 32 gallons of CO2)


Baking Soda vs. Sodium Bicarbonate Tablets
There is another option other than Baking Soda for getting Sodium Bicarbonate. You can purchase Sodium Bicarbonate tablets, which are sold as antacids to relieve heartburn, sour stomach, and acid indigestion.


You can purchase 10 gram tablets at around $14 - $20 a bottle for 1000 tablets. That is 10,000 grams of Sodium Bicarbonate or enough to generate about 714 gallons of CO2. That is still pretty cheap, There are some distinct advantages of using tablets.
Pros:
  1. You don’t need to measure out baking soda.
  2. You don’t need to build toilet paper charges, to fuel the reaction.
  3. It is also a little easier to fuel the generator than with the toilet paper charge (but not by much.)
  4. The tablets would also allow you to more easily meter out the dosages so that you can control the speed of the reaction better.
Cons:
  1. Cost.
    a. Tablets: $14 - $20 / 714 Gallons of CO2
    b. Baking Soda: $9.68 / (22 Boxes @ 44 ¢ / Box) = 714 Gallons of CO2​
    Making the Charges is easy and quick.
    Loading the Generator is a little easier with the tablets, but not by much.


How to Build a CO2 Generator / Gas Separator

Here is a drawing of the original CO2 Generator / Gas Separator that I put together.


Parts List:
Gas Generator Chamber Options:
  1. A one-gallon plastic milk jug with a screw on lid.
  2. 2 Liter soda / pop bottle with a screw on Lid for smaller batches. Ie. (to bug bomb an individual plant, Euthanasia tank)
  3. 2 – 5 Gallon Plastic Water Bottles or Carboy Jug (For larger tanks)

After thinking about it and experimenting with the process for a while I changed my design from the 2 liter bottle to a 1 gallon milk jug. I chose a one-gallon plastic milk jug a number of reasons.
  • It provides a large enough CO2 generation tank for my needs.

  • It is free. I just pulled it from it from the recycle bin and rinsed it out.

  • It is strong enough to take the pressures generated.

  • The kicker for choosing the milk jug was because I feel it is the safest option of the three.
    • It has a small thin threaded screw on lid, which acts as a safety valve. If the chamber builds up too much pressure, the lid is soft enough, pliable enough with very thin threads that it makes a great pop off safety valve. If the pressure builds up too much the lid just pops off long before the jug could explode. (It does create quite a mess though if this happens, but folks use soda water for removing stains from carpeting so it is not really a big deal unless you have hardwood or laminated flooring.)
    • If something like a large wade of toilet paper did plug the lid and the valve failed to pop off, the plastic is soft and would not cause any real damage, it would just make a big bang.

    Warning: I do not recommend using glass jars for the CO2 generation chamber. If you make a mistake and add too much Baking soda to a full load of fresh vinegar in the chamber you could end up with a dangerous glass shrapnel bomb on your hands.

    Gas Separation Chamber
  • 16 oz. – 20 oz soda / pop bottle with screw on lid.

    I used a 16oz pop bottle as a gas separation chamber. The purpose of the separator bottle is that if / when the generator bottle overflows with too much foam from the reaction chamber, the foam gets pushed out into the separator bottle and is then captured. The CO2 is then released and goes on to your tank, while the separator chamber captures the foam which keeps the vinegar and baking soda from being transferred into your tank.

Other Parts
  • 4 feet or so of ¼ inch Inside Diameter aquarium airline tubing.
  • Rubber bands or Nylon Zip Ties.


Attachments

#3 ·
Building a CO2 Generator / Gas Separator

  1. Preparing to Drill for the tubing. Start off by sizing the drill bit so that the hole is an 1/8th to a 1/16th of an inch smaller then the outside diameter of the tubing. This allows the tubing to be compressed, so it has to be squeezed through the hole for a pressure tight fit.


  2. I started by drilling one hole in the top of the Generator Chamber’s screw on lid. Installing the bottle cap onto the bottle allows you hold and drill safely and it supports the cap so that it won't collapse the cap.


  3. Drill two holes in the top of the 16-oz pop bottle cap. One hole willhold the air tubing that will come from the CO2 generator tank and the other will run the CO2 up to your tank.


  4. With a sharp utility knife, clean up the drill holes by removing the plastic beads that form around the lip or edge of the drilled out hole.


  5. Cut an angle on both ends of a piece of airline tubing. This bevel makes it easier to install the tubing into the lids.

  6. The tubing installs best by twisting the airline with a drilling motion as you press the tube down into the hole. The Tubing should be long enough so that it will stick down into the top of the milk jug by about ½ an inch.


    Then it should gently loop up and then down into the top of the 16 oz bottle and then run down the length until it reaches the bottom of the separator bottle.


    The second airline tubing should also have an angle cut and be installed in the second hole of the separator bottle. This line exits the separator bottle and should be long enough to easily reach the top of your tank or euthanasia chamber.

  7. Rubber band or Zip-tie the 16 oz bottle to the handle of the Gallon Milk Jug.


Next: Calculate The Volume Of The Tank To Be Filled With CO2
We need to determine how much CO2 gas must be generated to fill the tank. To do this I measured the tank’s dimensions from the outside of the glass. My tank measured:

20 inches Wide x 18 inches High x 10 inches Deep


Using the following site: Tank Volume Calculator
I calculated that the exterior volume of the tank to be about 15.5 gallons. If I had taken the measurement from the tanks interior I’m sure it would likely have come in at it’s rated 15 gallons.

Therefore now we can figure how much Baking Soda and Vinegar we would need to fill the tank with CO2.

15 Gallons of CO2

………… Baking Soda ……………………………|……………………………………… Vinegar ………………………………………………|…………… CO2
……70 gr =………1/4 c. + 3.0 T. | 1 L =……… 4 1/4 c. = ……33.81 fl oz …………………|…… 5 Gallons
…140 gr =………1/2 c. + 3.4 t. | 2 L =……… 8 1/2 c. = … 67.62 fl oz …………………|… 10 Gallons


To Make 15 Gallons of CO2 Requires:

Total Baking Soda:
210 grams OR {3/4 of a cup + (6.4 teaspoons OR equals 2 Tbsp. OR 1/8 Cup)} OR 7/8 cup.

Total Vinegar: 3 L OR 101.43 fl oz OR 12 & 3/4 cups


But I want to flood the tank, to overflow it with CO2, so I am going to generate 20 gallons of CO2 to flood the 15 gallon tank to make sure that all oxygen is pushed out. Therefore I will use this table instead.

20 Gallons of CO2

………… Baking Soda ……………………………|……………………………………… Vinegar ………………………………………………|…………… CO2
…280 gr = 1 1/8 c. + 4.8 t. | 4 L = 1 gal.+7/8c. = 135.25 fl oz …………………|… 20 Gallons


Sounds good, but there is one small problem. You can't get more than a gallon of stuff into a one gallon milk jug. In my experiments, I found that 15 gallons of CO2 was about the most CO2 that I could get out of the 1 gallon milk jug because that was the most Vinegar that would comfortably fit into the jug while allowing room for the foam to expand.

Therefore to do 20 gallons easily and make sure that I was getting the correct proportions of Baking Soda and Vinegar in the generator, I did (2) – 10 gallon sets. This worked really well and the process was quick. When the first batch was done I dumped the generator mix of the vinegar / water / baking soda down the toilet (there is nothing toxic in it). I rinsed and flushed out the generator with water and then reloaded it with Vinegar for the next set.


So to do 20 gallons of CO2, I would do the following formulation twice.

10 Gallons of CO2 Twice

………… Baking Soda ……………………………|……………………………………… Vinegar ………………………………………………|…………… CO2
…140 gr =………1/2 c. + 3.4 t. | 2 L =……… 8 1/2 c. = … 67.62 fl oz …………………|… 10 Gallons


Operation Of The CO2 Generator

Preparing The Baking Soda Charges:

Option 1 – Baking Soda:

………… Baking Soda ……………………………|…………… CO2
…140 gr =………1/2 c. + 3.4 t. |… 10 Gallons


Therefore, to make 10 gallons of CO2, we need 140 grams of Baking Soda which is 1/2 cup + 3.4 teaspoons. I rounded this to a couple of tablespoons. All total in cups this is about 5/8 of a cup of baking soda.
Photo5/8thCupBakingSoda
 

Attachments

#4 ·
Steps in making the charge:
This is 5/8 of a Cup of Baking Soda which will make 10 gallons of CO2.


  1. Unroll and tear off two squares of toilet paper for each charge.
  2. Pour about 1 tablespoon of baking soda starting at the tear line between the sheets and pouring along the length of the sheet about ½ an inch from one edge of the paper. Leave about a ½ to ¾ of an inch gap at the top of the charge.


  3. Fold the bottom sheet up to cover the Baking Soda.


  4. You will be creating a tube or cylinder of Baking Soda, so starting from the side closest to the Baking Soda roll the toilet paper and Baking Soda up in towards the center of the TP like a cigarette.


It took all of about 1 1/2 to 2 minutes to roll out and tear off the sheets, fill and roll out the 9 to 10 baking soda charges needed for the 10 gallons of CO2.


I originally folded the charges into thirds, but found that rolling the charges was much faster, easier to do, and the Baking Soda was more secure within the TP. Also the round shape made it easier to insert the charge into the round mouth of the chamber.


Option 2 – Sodium Bicarbonate Tablets:


Baking Soda ……|……… CO2
…140 gr = …………|… 10 Gallons


If the Sodium Bicarbonate Tablets you have are 10 grams tablets, just count out the number of tables needed to equal number of grams required for complete reaction. In my case, to generate 10 Gallons of CO2 the reaction would require 140 grams, which is the equivalent of (14) 10-gram tablets.


Tank Preparation For The Bug Bombing:

  1. Remove your frogs from the tank. If you have any isopods that you don’t have in a separate culture container, remove some adults and start a new culture. CO2 will kill frogs and isopods. Springtails are a bit hardier and I have had springtails survive several CO2 bombings.

  2. If you have any vents that are below the top of the tank, ie. European style front vents, you will need to tape these completely closed so that the CO2 will not be able to escape or leak out. If you have a front opening tank, tape the door closed at all the edges of the glass. Use a vent at the top to funnel the CO2 down into the tank.

  3. Then just take the output hose from the separator tank and put it into the top of your tank / euthanasia chamber / plastic bag holding a plant. The carbon dioxide that is generated will be more dense and heavier then the air in the tank, which will cause it to sink to the bottom of the tank. The oxygen, being lighter than the CO2, will rise and escape out the top of the tank. You need to make sure that there is an air gap at the top of your tank so that the air in the tank will be able to flow out from the tank as the falling CO2 forces it up and out of the tank.


Loading the Generator Chamber:

1. Add the Vinegar


…………… Vinegar …………………………………………………………… CO2
2 L = 8 1/2 c. = 67.62 fl oz …………… 10 Gallon


With a funnel, or measuring cup pour the proper amount of vinegar (in this case 8 1/2 cups) into generator bottle allowing enough room for the baking soda toilet paper charge to be inserted without the charge getting wet. I found that it seemed to work best to fill the vinegar to a max of about 3/4 full. This allows for the foam to expand and contract without all of it being pumped into the separation chamber.

The first time that I fill the tank with a set level of vinegar, say for a 10 gallon CO2 fill, I mark the fill line on the tank with a sharpie also writing the amount of CO2 generated for that fill line. This makes future fills quicker and easier.

If you are using the sodium bicarbonate tablets, don’t fill the chamber fuller than ¾ of a tank as you still need to allow room for the mixture to foam up then and condense back down as the gas expands and contracts.


2. Adding the Sodium Bicarbonate:

Option A: Baking Soda Charge:
Insert the baking soda charge into the generator chamber. If the Baking Soda Charge is a bit larger then the mouth opening, I found that wiggling the charge in a circular motion and shaking the bottom of the charge allowed the charge to slide into the opening pretty easily. (I had this problem only when I folded the charges.)

Originally I held the charge up at the top of the generator and folded top edge of the toilet paper over the lip of the Generator screwing the paper under the cap so that the charge was left hanging up and out of the vinegar, thus charging and priming the generator. You can see the toilet paper charge underneath the threads of the blue cap with the charge hanging in the air inside the generator.

Then, when everything was primed and set, I would shake the vinegar so that it would splash up and make contact with the Charge. This would then set off the reaction.

I found that all of this was completely un-necessary. It is far easier, quicker and the chamber seals up much better if you just drop the charge into the vinegar and then screw on the lid quickly. It really works quite well with very little loss of CO2.

Option B: Bicarb Tablet:
To use the tablets, you just need to drop 1 – 2 tablets into the vinegar and close up the lid quickly. They will fizz and foam up just like Alka-Seltzer (which is just a self contained CO2 generator, being made up of a combination of aspirin (acetylsalicylic acid), sodium bicarbonate, and citric acid).


The Reaction & CO2 production:

At this point the reaction is should be starting and you should see the vinegar foaming and bubbling as the CO2 is being produced. I swirl the jug initially for a few seconds after the TP has had some time to dissolve so as to completely mix the acid / baking soda to get a complete reaction more quickly.

The reaction does produce quite a bit of foam and pressure. This forces the CO2 out of the generator, through the separator chamber and out into your tank.

When the foaming and bubbling in the vinegar slows and stops, you are ready to reload the chamber with the next charge of Baking Soda or with new tablets.

Repeat the process until your tank is filled with CO2 or the vinegar is depleted.
 

Attachments

#5 ·
Nice write up. I use something kind of similar for my 20 gallon fish tank. I just have a 2 liter bottle with 1 cup sugar, 1/4 tsp yeast, 1/8 tsp baking soda and it keeps my co2 at about 30 ppm for a week. I'm still trying to tweak a few things to make it last longer (supposedly it's supposed to last about 2-3 weeks), but it has definitely helped out my plants.


And my little drop checker confirming correct co2 levels
 
#6 ·
How to tell if the tank is full of CO2

One of the benefits of the dry ice method is that you can actually see the air being displaced by the CO2. Because the CO2 that is coming off of the dry ice is so cold, any moisture in the air precipitates out and creates that beautifully cool fog.

The baking soda CO2 generator does not produce the same neat fog that dry ice does because the CO2 is not over 100 degrees below zero like the CO2 which comes from dry ice.

I searched the web for any reference on how to being able to detect CO2 in a small enclosed environment like our tanks. The only thing that I found on the web was a neat little trick that I saw on youtube using children's bubble blowing soap.


A. Children’s Bubble Soap
Children’s bubble blowing soap with a bubble wand can be purchased in a toy store, at Walmart, the Dollar Store, the grocery store, etc.


Using Bubble Soap To Determine CO2 Level In Tank


Because pure CO2 is about one and a half times heavier than the air that we breath, it is also heavier than the air that we exhale. Therefore blowing a few bubbles into the tank should give us an indicator of the height of the CO2 level within the tank.

While I found that it does work, this is kind of a tricky process. You don’t want to blow the bubbles directly down into the tank.
  • The force of your breath can and will dissipate quite a bit of CO2 gas out of the tank.
  • You can blow the bubbles down into the CO2 gas, which can cause them to pop.


You will want to try and blow the bubble across the top of the tank so that the bubbles will gently float or settle down and sit on top of the carbon dioxide showing you the level of the CO2.


If you do it just right, the bubbles will end up floating on top of the layer of CO2. This is because the bubbles are filled with air that is less dense and is lighter than the layer of carbon dioxide so the bubbles should just float and sit on top of the invisible gas. It is really a cool thing to watch and if you do it just right, it will tell you how full you tank is with the CO2 gas.

Here you can see a video of bubble floating on top of a layer of CO2.


In reality, this process is a lot tougher to accomplish than it sounds. If the bubble falls from too great of a height, the downward fall will force it to penetrate under the CO2 layer, causing it to pop. After tons of tries, I was only able to get a bubble to float on the CO2 layer in my tank just once. It was real cool to watch a bubble sit and float in the middle of the air in the middle of my tank. The bubble ended up popping on a rock before I could snap a picture. The above video made it seem so easy, but I had lots of troubles making this work, and it was never easy or consistent.

  1. It may be that the video was able to get bubbles to float on the layer of due to the fact that CO2 was in constant production from the dry ice that was used to generate the CO2.

  2. It may be that cold inversion layer helped float the bubble.

  3. It may be that my bubble soap was too old. (It’s been in the house for a couple of years, but I have a hard time believing that bubble soap goes bad.)

I also struggled with the idea of blowing bubbles into the tank because I don’t like the idea of introducing soap and glycerin into my tank’s environment. I thought there could possibly be negative effects for both my frogs and my plants. So I kept looking for an easier and safer way to determine the height of the CO2. in the tank. I found nothing on the web that was any help. With some experimenting, I did find an answer and it was sitting on top of my tank the whole time.


B. Ultrasonic Fog Generator
I have a Kaz “Personal Mist” Ultrasonic Fog Generator that I bought for $12 at one of our local liquidator stores. I did a lot of experimenting and found the fog generator is an excellent way to determine the height or level of CO2 in the tank.

Procedures:
If you have an ultrasonic fog generator, before you add CO2 to you tank, run the fog machine to “literally see” what the fog looks like as it cascades down into a normal air / oxygen filled tank. In my tanks, I have my fog being pumped down into the tank from two holes the top and as it flows, it streams or flows down looking like a ribbon or waterfall of fog.

Then, when you think that your tank is about ½ to ¾ full of CO2, run your fog machine again and watch what happens when the fog hits the wall of CO2. The fog abruptly stops and bounces when it hits the surface of the CO2.

Then the cloud of fog / water vapor will begin to rain, making cool little trails of mist and rain droplets as the water vapor precipitates and rains down through the CO2 and out of the fog. This bounce line will be the level of the CO2 in your tank.

Then when you think you have filled the tank full of CO2, run the fog machine again in a few short bursts. See how the fog kind of bounces at the top of the tank as it tries to enter the tank. Depending on the amount of pressure that your fogging machine generates, you might end up dissipating and dispersing some of the CO2, so turning it on and off in short bursts should help keep the CO2 in your tank.


Notes on the CO2 Generation Process:
  • When the CO2 chamber is initially charged with vinegar and the acid content is high, if you put too much baking soda into the chamber you may be able to blow the top right off of the CO2 chamber from too much pressure being applied to the cap. Toward the end of the CO2 run I have been able to place two charges into the generator at one time in order to speed the reaction along, but one time I either placed too much baking soda into the chamber or the end got plugged with a large wad of toilet paper from the double charge. This caused the speeding reaction to pop the lid off the milk jug chamber. The safety valve worked just as expected, but it did spray sodium bicarbonate and vinegar all over the place. There was this cool little volcano sprouting up right in the middle of my living room shooting a geyser of foaming liquid everywhere. The kids thought it was great fun. Dad was dancing around trying to literally “put a cork in it.” They even helped clean up when the show was all over.

    • This event is specifically why I chose to use the milk jug as my primary chamber. Its short cap, narrow threads and soft plastic make a perfect safety pressure release valve. The lids and threads on pop / soda bottles and carboys are much larger and fatter and are designed to hold up to the pressure caused by CO2. This could cause the container to rupture, exploding from the pressure because the lid holds a bit “too well”.

    • Actually I don’t really believe that a pop bottle or carboy generator would be likely to explode. This is because of the hole drilled into the end of the lid for the ¼ inch tubing. I think it is far more likely that the bottle would become a literal “Bottle Rocket” or an erupting volcano if too much pressure were to build up in the generator, but without the safety valve, you never know if you might end up having this in your living room / frog room.


    • The above kids are prime candidates for the Darwin Awards (The Darwin Awards)


  • When the vinegar from the CO2 reaction is completely spent, just remove the milk jug cap and swirl the depleted mixture down the toilet. Finally rinse out the generator bottle with clean water to remove any residual unused baking soda so that it will not react with the new vinegar that you will be adding as you set up for the next reaction. Dump everything out and reload for the next shot.

  • When running the fog machine to determine the level of the CO2, I found that it worked the best visually for me to see the line when I turned the fogger on and off in short bursts.

  • 24 hours after bombed the tank, I noticed that I had a number of springtails survive the gas chamber. I have noticed that my springtails are pretty tolerant to CO2 hypoxia. A while ago I got a shipment from a friend of tropical springtails which were mixed together with Dwarf Striped Isopods. In my excitement, I put too many chopped up veggies into the container and as they decomposed, they generated a lot of CO2. This killed off all of the isopods and a lot of the springtails, but many of the springtails survived and the culture came back. Not knowing the tolerance level of slugs to CO2, I decided to give the tank another jolt of CO2 the next day. We’ll see what happens.
    • I did find that I had to remove the frogs and re-bomb the tank again as the snail’s eggs began to hatch. I had little baby slugs beginning to show up in the tank a little while later. I gather this was because insect and slug eggs are much more tolerant of high CO2 levels, so you may need to redo the treatment again a week or two later after they hatch.
    • If you notice that the slugs come back right away, or that some adult slugs make it through the initial dosing, you should bomb the tank several days in a row in a effort to kill them. Or you could do an initial CO2 dose with the generator, and then use the Yeast / Sugar method to keep the tank full of CO2 over a several day period. If you go this route, you might need to start the yeast mixture early in order to get the CO2 production from the yeast going before you do the initial CO2 treatment.

  • I was kind of surprised that the oxygen level popped back up fairly quickly after doing the CO2 dosing. I have a glass lid that covers the entire opening of the tank with just two small holes in the back of the lid, which are covered by the PVC pipe that comes from the fog machine. I found that I had active springtails the next morning.
    • It may be that the plants produced enough oxygen over the course of the day to consume the CO2 and replace it with oxygen, so in the future I will turn the lights off and cover the tank to prevent the plants from photosynthesizing and converting the CO2 to Oxygen and energy.

    • It could also be that running the fog machine in order to determine the height of the CO2 may also contribute to the dissipation of the CO2. Future experiments may determine the truth.

  • In one test, I added a number of fruit flies to the tank before I bombed it, so I could see how quickly the CO2 affected the tank. The flies moved around for a short period, maybe 2-3 minutes and then all movement stropped. This again might be a good test if you do not have an ultrasonic fog machine.

  • Yesterday when I re-bombed the tank I timed how long it took to set up, roll the charges, generate the CO2, and clean up. From start to finish it took only about 15 minutes. This also included having my eight year daughter “help me” roll several baking soda charges.
 

Attachments

#7 ·
Using dry ice or a CO2 generator are not the only ways to get CO2 into your tank.

Using CO2 Tanks
There is a high tech way of generating CO2. You can use bottled tanks of carbon dioxide.

There are several different hobbies that use aluminum or steel tanks for CO2 storage and use. The aquarium hobby uses them to provide CO2 for the plants in their aquariums. Also the home soda fountain and beer home brewing hobbyist also use CO2 tanks to carbonate their beverages.

Aquarium setups will typically use two regulators and a whole lot of other stuff like bubble counters etc. and we really don’t need most of that stuff. Many of the home brew guys use only one regulator on their set ups.


The needs that we have in our hobby are much simpler than what any of these other groups require. We don’t need things like bubble counters and unless you are going to make an euthanasia chamber you probably don’t need a regulator either.

All we really need is a simple CO2 source that can be piped into a tank in order to kill the bugs and slugs that come in with our plants, rocks and branches. With our simple system we should also be able to do safe and humane euthanasia of hurt or birth defective animals.

At its simplest, a small refillable tank connected with a simple delivery system would suffice our needs. Hmmm. Is there anyone out there using such a thing now? Yes, there is! Paintball enthusiasts use small CO2 tanks that would be ideal for this kind of use. They are small, relatively inexpensive, and they are easy and cheap to refill.

Welders also use CO2 tanks but their systems require a lot more CO2 so their tanks are a quite a bit larger, thus they cost a fair bit more.

Paintball Tanks:
Here is a picture of that parts that we could use for our tanks.


Paintball tank sizes run from 9 oz, 12 oz, 16 oz and 20 oz.

I wanted to calculate how much CO2 a tank would generate to see what size would be most appropriate.

CO2 => Mole Weight of 44g/mole.

1 mole of gas at STP is equivalent to 22.4 liters => 16g will make approximately 8.1 liters and 1 ounce = 28.3495231 grams.​

From this I generated the following table.

This will produce the following amounts of CO2
Cylinder…Liters……Gallons
…9 Oz.………129.9……=…34.3
12 Oz.………173.2……=…45.8
16 Oz.………230.9……=…61.0
20 Oz.………288.6……=…76.4
If you have a paint ball tank, refilling it runs between $2.00 - $4.00 at the your local sporting goods stores. If you aren’t into paintball, check to see if any of your friends might have the equipment that you need, as you might not even have to buy a tank or remote, just borrow theirs for a quick squirt into your tank.


If you want your own equipment, the tanks cost from $9.00 - $40.00 and can be purchased online or from almost any sporting goods store or any paintball shop. I did quite a bit of researching for this article and found that the prices at our local sporting good store’s and paintball establishment’s, were quite a bit higher than many of the online sources, even with shipping factored in.

  • While the most common paintball tank size is probably the 20oz tank, the smaller sized tanks should be just fine for our hobby.
  • Beyond the cost of a tank, you will also need to purchase what is called a “Paintball Coiled Remote with quick disconnect.” The Remote is designed to power the gun while the tank is located remotely on a belt or backpack unit. The remote is able to connect to the paintball tank’s oddball thread size, it has an on / off valve, a coiled supply line, some standard sized connection fittings, as well as a quick disconnect. This unit is real cheap when compared to the cost of all of the fittings you would need purchase in order to connect to the tank if you went out to buy all of the fittings on your own.


Here is the best price that I have located on line for the pair.

Coiled Remote and CO2 Tank Combo


I also found that Amazon.com had some of the best prices for the individual parts, and if you combined a tank and the “Paintball Remote”, you can sometimes get free shipping.

The best prices that I found for both the 20oz. tank and the remote were found online and prices were running between $28 - $49. The paintball and sporting goods stores around here were almost twice that.

Newbies Guide to CO2 / CO2 Tanks.


A google search of “Paintball CO2 tanks” will give you a lot more info.

If you want to adjust or regulate the pressure stream that is ported out of the tank you will need to add a pressure regulator.


A regulator is required if you are planning on using bottled CO2 for euthanizing your frogs and tadpoles. Without it you can eject too much CO2 too quickly which can freeze an animal or stress them out from too high of a volume flow. (More information is posted below.)

In order attach a regulator you should know that the threading on every paintball tank is an oddball fitting. The international ASTM thread standards designation is known as F1750-05. The ASA designation for the paintball threads is CGA-320. I share this because without the proper adaptor, it is impossible to connect to the tank outside of using epoxy as one home brewer did that I read about. The home brewing industry has developed an adapter that can covert the tank’s thread into a standard regulator fitting size so that one can attach a pressure regulator to the tank.


BREWER'S EDGE® PAINTBALL REGULATOR ADAPTER

The Adapter" CO2 regulator to Paintball tank Adapter


Regulators are relatively inexpensive and you should be able to use a cheap ¼ inch air compressor regulator.
Cheap 125 PSI Air Flow Regulator

You may need to get a few other fittings to convert the lines to a ¼ inch regulator thread. I have found that Lowes seems to have a larger array of fittings than does Home Depot.

You have the coiled remote, you may not need the home brewers adaptor to connect a regulator as I believe the fittings on the quick disconnects are standard fittings.

Tips on using a Paintball tank with remote.
  1. When connecting the Remote to the tank, make sure that the valve on the remote is in the off position. Otherwise when you make the connection, you will blow CO2 all over as you are screwing the remote onto the tank.
  2. Keep the tank in an upright position or you will vent liquid CO2 rather than CO2 gas.
  3. If you do not run a regulator, turn the valve on very slowly, and only crack it a small amount. You don’t need full pressure. It is after all a high-pressure tank.


Bike CO2 tanks:
Bicycle shops also carry small CO2 tanks little bigger than a pencil which they use to re-inflate bike tires. These are small and relatively inexpensive. The cartridges come in many different sizes, 12g, 16g, 25g, 38g, 40g, 45g, and 88g. The non-threaded cartridges are usually much cheaper than the threaded.

Different Size CO2 Bike Tanks


Here’s kind of a cool video of how these bike cylinders are made.


You can get a Schrader tire valve with an 1/8” fitting at your local Auto Parts store. You can also get Schrader valve at your local tire shop. If you go in and ask how much the all metal screw in Schrader valves costs, they will usually just take you in back and hand you one no charge. These are very easy to install into a chamber by drilling a 3/8 hole and popping it in place with a washer and nut. These valves even have a rubber bushing on the base to seal it up.


The problem that I see with using these non-refillable cartridges is the expense per gallon of CO2 produced. I calculated the volume of CO2 contained in the various size cylinders.

Cylinder ……Liters…Gallons
12 Grams ………6.1………1.6
16 Grams ………8.1………2.2
25 Grams ……12.7………3.4
38 Grams ……19.3………5.1
45 Grams ……22.9………6.0
88 Grams ……44.8………1.8
Because of the convenience, some might find using the bike CO2 tanks appealing so I added the information.
 

Attachments

#9 ·
Thanks,

I was kind of wondering whether anyone was interested because there has been so little comment. I kind of have been thinking why spend the time to document the process if no-one cares. I have one more section which I have been working on which deals with the different uses / CO2 Chambers. Euthanasia tank, moss collection, new plants, etc.
 
#10 ·
Opps. I found an important typo that needs correcting.

Cylinder ……Liters…Gallons
12 Grams ………6.1………1.6
16 Grams ………8.1………2.2
25 Grams ……12.7………3.4
38 Grams ……19.3………5.1
45 Grams ……22.9………6.0
88 Grams ……44.8………1.8
In the 88 Gram tank it should read 11.8 Gallons, not 1.8 Gallons.


The Corrected table should be as follows:

Cylinder ……Liters…Gallons
12 Grams ………6.1………1.6
16 Grams ………8.1………2.2
25 Grams ……12.7………3.4
38 Grams ……19.3………5.1
45 Grams ……22.9………6.0
88 Grams ……44.8……11.8
 
#11 ·
Thank you very much! I always read about CO2 bombing tanks, but never really knew how to go about it. Very informative posts.

I loved the youtube videos, now waiting for my next shipment of Omaha Steaks that my grandma loves to send me with the nice healthy bag of dry ice in the bottom. Can't wait to see my little girls eyes when she sees the gigantic white bubble form!

JrayJ
 
#13 ·
Examples of Uses for CO2


CO2 to Kill Bugs / Slugs In A Tank

Been there done that got the Tee shirt, plus lots of pictures.


CO2 to Euthanasia Amphibians / Reptiles
In our community there are differing opinions on whether CO2 is a humanely acceptable method for culling reptiles and amphibians. In researching for this article, I found that the American Veterinary Medical Association has published guidelines about euthanizing small animals. In the AVMA Guidelines on Euthanasia 2007, these Veterinary practitioners feel that the use of CO2 is an acceptable method to terminate Amphibians and reptiles.

Carbon dioxide—Amphibians,1 reptiles,1 and fish203-205 may be euthanized with CO2. Loss of consciousness develops rapidly, but exposure times required for euthanasia are prolonged. This technique is more effective in active species and those with less tendency to hold their breath. Page 20
Dart Frogs
Our frogs are not swimmers, but are of the active variety and therefore do not tend to fit into the “Hold their breath” category.

Tadpoles
Also they say that fish can be euthanized with CO2 so our tads should be able to be put down in this way as well. To do this I imagine that you would insert the line from the CO2 separator tank into the water of a deli cup, making sure that there is a good air space above the waterline of the cup so that the CO2 will be able to build up within the cup above the waterline as you bubble the CO2 into the water. Adding an air stone to the line so that the CO2 bubbles would be able to aerate and saturate the water would be helpful to speed along this process.


Appendix 1 under amphibians lists all of the acceptable methods of euthanasia.
Barbiturates, inhalant anesthetics (in appropriate species), CO2, CO, tricaine methane sulfonate (TMS, MS 222), benzocaine hydrochloride, double pithing
I believe that there are a couple of reasons that using CO2 is considered an acceptable method of euthanizing amphibians and reptiles even though some species of amphibians and reptiles can survive under severe oxygen depravation.

  1. carbon dioxide is a potent central nervous system depressant and thus causes rapid unconsciousness and is an anesthetic. It therefore reduces an animal’s sensitivity to pain and can cause unconsciousness rather quickly.

  2. Because low oxygen levels in many of these species is a natural state of being for the animal, (ie. When they are swimming.) Therefore the oxygen deprivation debt is not putting them in distress while they are being put down, it just takes a longer period of time for the animal to expire, to “croak” so to speak.


Suggested Reading:

American Veterinary Medical Association's Guidelines on Euthanasia This file is large and may take a bit of time to load.

Caudata Culture Articles - Euthanasia

Controversial Euthanasia Methods - Definitions, Policies And Guidelines

A Study on the Anesthetic Properties of Carbon Dioxide in the Rat


Euthanasia Chamber
Here are a couple of articles that discuss how to build and use an euthanasia chamber.

Small Animal Euthanasia at Home using Baking Soda & Vinegar

The Reptile Rack Knowledgebase / CO2 Chamber Using Compressed CO2 Gas


For our needs, a simple small Tupperware container with snap on / screw on lid would be a perfectly acceptable euthanasia chamber.


Make sure that the CO2 comes in at the top of the chamber and that there are oxygen evacuation holes drilled in the lid so that the oxygen can be pushed up and out of the holes allowing the air in the chamber to be replaced with CO2. The CO2 hose could be connected to the chamber with a – 3/8” x 1/4" Brass Male Rigid Pipe to Barb Fitting.


Euthanasia Chamber Procedures:

CO2 CHAMBER PROCEDURES and ASSURING DEATH FOLLOWING CO2 EUTHANASIA

Standard operating procedures (SOP) describing the different recognized methods for rodent euthanasia.

Both of these are aimed at putting down rodents, but the methods and procedures should be about the same for amphibians.


Using the Baking Soda Method & Euthanasia
If you choose to use the Baking Soda / Vinegar method of generating the CO2, you will need to experiment with the mixtures before you make any attempts to put a frog down. You do not want to generate CO2 too quickly, like we were doing when filling the tank. The CO2 flow rate should provide a balance between the time to unconsciousness and the adverseness of the noise and high-velocity air movement which can come from too-high of a flow rate. A fill rate of about 20% of the chamber’s volume per minute would be what is recommended.


CO2 to Kill Bugs & Slugs In A
Moss / Bug Gas Chamber


When we collect moss from the wild, we can kill the slugs and critters in the moss without concern of transferring slugs and millipedes to our tank. I just did this with a bunch of moss, and it was quick and easy.


CO2 to Kill Bugs & Slugs In A
Plastic Plant Bag Gas Chamber


Using a Plastic Grocery Bag you can create a Gas Chamber for an individual plant that you purchased, in order to gas the bugs before the plant is introduced to your tank.


This is the last installment that I have planned.

I was kind of inspired to do this when when someone posted their experience of using dry ice to try and kill bugs and the extreme cold completely toasted their plants.

I hope that you all enjoyed the article and find the information helpful.
 
#14 ·
Since this last post, there have been some substantial changes to the euthanasia recommendations (2020 revision):


Flow metering is recommended (and so dry ice or vinegar methods are not acceptable): p 28ff.
Secondary method (pithing, decapitation, etc) is necessary to ensure death: p 92
 
#17 ·
I have unlimited access to 5lb and 20lb CO2 tanks and would like to start treating all my new plants with this method as a precaution. I'm good on the setup and build. I am a little unclear on how long at any given psi I should let my CO2 tank fill my CO2 chamber for? Seems like it would be pretty fast. I plant to use an 80 quart tub.
 
#18 ·
Use a flowmeter. I have this one, and it works well (for euthanizing rodents, which requires regulated flow). Set it for x liters/min and do the math to determine when the viv is full.

FWIW, 100% CO2 does not kill slugs after two back to back 24hr treatments in a viv, nor does it kill predatory flatworms after hours in a vial, per my past attempts.
 
  • Like
Reactions: varanoid
#20 ·
I don't know how many it killed, but enough of them remained alive that they repopulated over time. It just isn't a reliable 100% kill method by any stretch, is what I was trying to say.

Personally, I'm not sold on the idea of CO2 bombing. Many animals have an unbelievable tolerance for anoxia -- some species of reptiles and amphibians can survive 27 hours without oxygen, according to the euthanasia guidelines I linked above. Neonate mammals cannot reliably be killed by CO2. I don't have faith that something that lives in the ground is really phased at all by CO2 buildup. Just my 2 cents, though -- I guess I'm still sore about the slugs.

Well, if you have CO2 left when you've given it a try, at least you can carbonate some beer. ;) Good luck, and report back! :)
 
This is an older thread, you may not receive a response, and could be reviving an old thread. Please consider creating a new thread.
Top